Somehow it’s been a year since we bought our first car! The time has flown and it doesn’t feel like it’s been that long, but here we are.
In contrast, I can almost believe it because during that time, I have learned a fair bit about both cars and being a car owner! So let’s dive into what I’ve learned during the last year as a complete car newbie.
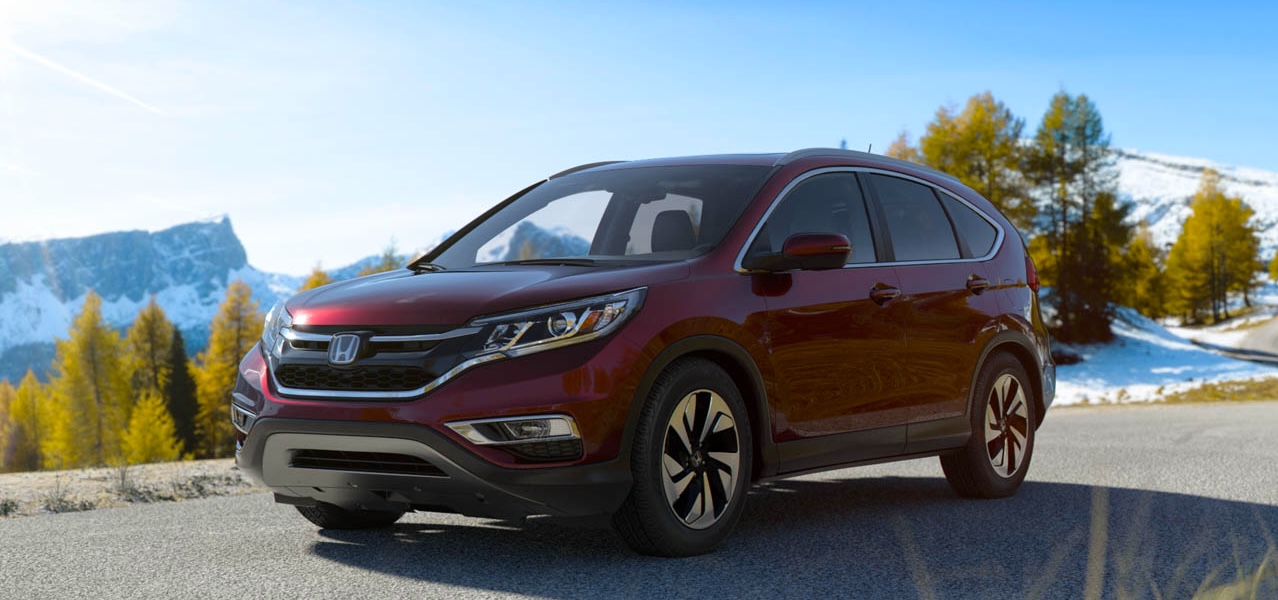
As background, in the below post I went into a lot of detail about the steps involved in buying our 2016 Honda CR-V EX for $13,000 and getting all its paperwork, insurance and inspections. So check that out if you want those kinds of details.
Buy Emergency Items
My aunt is all about preparation and has the same car we do, so I asked for suggestions for what we should have in a regular car and in one that drives in the winter. And she gave me the very comprehensive list (below).
- Car Mats
- Window Breaker
- Small Snow Shovel
- Very Long Windshield Scraper
- Rubber boots (Tall)
- Rain Ponchos (2)
- Waterproof Winter gloves
- Winter Hat
- Emergency Car Kit
- Flares
- Gas Container
- Battery Charger Cables (Long)
- Blanket
- Magnetic Flashlight and Batteries
- Quick Absorbent Towels
- Crank Charger
- Bungee Cords
- Tarp
- Paper Towels
- Wipes
- Umbrella
- Long Towels (2)
I had several of these things already and after talking to my Mom who is a little lower on the preparation scale, I bought the below items:
- 40″ Windshield Scraper
- Emergency Car Kit (which includes several of the other items listed above)
- 1 Gallon Gas Container
I actually bought these things in October 2025 and I’m so happy I bought them earlier than I thought I would need them because winter started early in 2025. Before Halloween our car was completely covered in ice.
I used that scraper and the long handle did come in handle to clear my entire SUV with my lady hands, I also learned how to de-fog up car windows and why that happens. It’s because the temperature inside and outside of the car are not the same and the goal is more of an equilibrium. Here are the tips I learned:
- If car windows are foggy, trying to get the temperature inside and outside closer by putting cold or hot air on the windows
- Put the AC button on even in the winter because it helps with dehumidifying the air
- Only use the Recirculation button in hot weather
- To help de-ice windows, blast the heat onto the front and rear windows
Ask An Independent Insurance Broker
A few months ago a reader recommended that I check out an independent insurance broker when I was complaining about the high cost of my Progressive car insurance (which is what we got as the easiest and most affordable option to get on the road ASAP). I had never really thought of independent insurance brokers and had dismissed them assuming they were scammy.
However, it seems like I was wrong 🙂 . I contacted a few local independent insurance agencies and heard back that they were offering auto insurance with the same exact protections for half of the prices that all of the other companies were quoting me.
I was paying Progressive $93.50/month and an independent insurance agency quoted me $42.58/month for Erie Insurance after I clarified that I drive less than 10K miles a year because I don’t use the car for any type of commute. A 55% discount! Curiously when I went directly to Erie’s website, they quoted me the same as Progressive.
So these independent brokers do seem to be providing much better deals than going directly to the insurance companies. I’m not clear on why that is since I always assumed that having a middleman makes things more expensive, not less, but feel free to let me know in the comments if you know how this works.
The bottom line is that we’re paying less for the same auto coverage. I also got to walk down the street to talk to a human person in my town who is selling me this insurance, and that experience was overall surprisingly pleasant 🙂 .
When I signed the contract digitally for my new insurance, my broker emailed me my temporary insurance card (which I printed at the local library for 25 cents 😉 ) and then 3 days before my insurance with Erie was set to start, I got a packet in the mail which included my actual insurance card. Perfection.
And as I mentioned in my last monthly recap, I was able to leave State Farm for my renter’s insurance when they got shady and use Erie for my renters’ insurance as well, which lowered that bill and lowered my car insurance even further to $38.16/month. Wins all around.
Save On Gas
I’m still getting used to the different gas station chains in the northeast and I’ve been shopping around since gas has skyrocketed with the idiotic war the US and Isreal started in Iran – so I’ve been noticing gas prices more recently since they went from around $3 to over $4 in NY State rather quickly.
When I was at the chain Cumberland Farms recently, I noticed that on the gas pump, the price was different for Non-Members and Members. I didn’t realize gas stations had any type of memberships so I decided to check it out. Cumberland Farms memberships are called SmartRewards and it’s FREE and gives 10 cents off per gallon always and various promos sporadically.
When you sign up, there’s also a promo that your first 3 fill ups get 30 cents off per gallon. However, there is a catch that I didn’t find clear when reading their landing page.
Apparently you ONLY get the 10 cents off if you pay with your checking account, not credit or debit cards. This was explicitly said in their FAQs, but I doubt regular people are diving that deep like my neurotic brain wanted to.
So luckily I read that and linked my checking account to this membership and can confirm that I’ve gotten all the promos they promised. So if you’re in the northeast and going to Cumbies anyway, this is a way to save a bit on gas prices that I wasn’t aware of and wanted to share.
I also suspected that other gas stations might have similar programs to save on gas, which I never thought to even look into. My FIL casually mentioned that he has saved over $1,500 with SmartRewards for doing basically nothing, so I’m glad I signed up.
Leverage Community
Our car made a weird sound for the first time and we acted like stereotypical new parents and freaked out and assumed the car was going to immediately explode 🙂 . Here’s what happened.
When I was in Perú, the car sat dormant for 2 weeks so I didn’t take all the advice from the awesome BGR post below that I’d previously mentioned. Oops!
And when I started driving the car again, there was an inexplicable noise so I had to investigate that. I called the mechanic that has a current warranty on my brakes, rotors and calipers, but they couldn’t see me for 2 weeks. I then called another mechanic and had a lackluster interaction only for them to tell me they could see me in 5 days. I called another mechanic and they didn’t even answer the phone.
So after trying to figure out what path to take, our community came in clutch once again. There’s apparently a local mechanic in the family tree and they could see me sooner than anyone else. I drove out to them and hilariously – the noise that had plagued us stopped on the drive there. I had made a joke about that exact thing happening like when your computer isn’t working, you call IT and it instantly pretends like it never did anything wrong in its life.
Luckily I had taken a video of the sound and was able to show it to the mechanic. He also took the whole wheel (where we were hearing the sound) apart to make sure everything was fine even with the noise gone.
And everything looked good! He told me what to check first if the noise comes back (the wheel bearing) and said that next time if no one drives the car, to basically ignore weird noises until you’ve driven it for an hour because most noises go away once it gets going again and it could just be a rock stuck in there or some other one-off while the car wakes up again.
The mechanic asked for $50 for this inspection and I gave him $60 because I didn’t have change and he deserved it. I had my peace of mind that the car wouldn’t immediately explode 🙂 . It’s been driving great ever since.
And we’ve learned our lesson! We’ve now told the family members we leave the car with while we’re traveling to feel free to use it at least once a week to help keep it running smoothly. Also, you’ll see in the DIY section that asking our community how to tackle car issues extends beyond having a mechanic in our circle.
Say No To Upsells
As I’ve mentioned before, New York State requires annual car inspections and it’s difficult to find a local mechanic that does them because the ROI isn’t very good. The state requires that these inspections cost $21 and they take 30-60 minutes to do. Bad ROI 🙂 .
So when I was calling around frantically to find someone local who would inspect my car in the 11 days the DMV gave me to complete this task after first registering the car, I found myself turning to auto repair chains – specifically Midas. I had a bit of a challenge scheduling my appointment that I went through in detail in my original car buying post.
In summary, I’ve now used Midas twice for my inspections and had a good time for one reason: I say no to their upsells. Both times I got an inspection they said I passed with flying colors, but I should also have this $1500 of work done on my car.
I politely say no thank you, they don’t push back further even when I’m a woman alone in an auto shop, and for that reason I returned to them. I then showed the list of suggested repairs they gave to my mechanic friend and he started laughing saying that some of these things he’d literally never done on a car because it’s completely unnecessary. So yeah, unnecessary upsells are out there and in this case I suspect that the people who agree to them are why they offer inspections in the first place.
However, if you’re looking to use Midas for an inspection, a great tip I learned that worked like a charm this year is that I should just text them at the number that sent me the inspection dashboard info because texts show up on all their computers and don’t go away until they deal with it, while an email is something extra they don’t always get to. A Midas employee at my first inspection told me that and it worked wonderfully this year.
Also something else happened that I wanted to point out in case it happens to you too: After my inspection this year, Midas said I needed to come back and get my tires re-torqued after 50 miles since they had to remove a tire to check something.
The Midas I went to for the inspection was far from my house so I walked into a different one in another state and they were able to help me and re-torque my tires for free. They got to it immediately and it was done in like 30 seconds. Very impressive.
DIY (If Safe)
Throughout the year I’ve learned that a lot of necessary car maintenance tasks are actually very simple and can be done at home in a few seconds or at most minutes. And doing so saved me a bunch of money compared to what Midas (for example) wanted to charge me for them to do it.
Air Filter Edition
Before leaving on my UK adventure, I changed the air filter in my new-to-me car and even though that may seem small, I’ve never done any level of “car maintenance” before so I was super proud of myself!
The process was so easy that it made me feel better about trying larger repairs that are fine for a novice. To find out how to do change an air filter in my car I watched the below very helpful video:
However, they left out a key piece of info for someone that knows nothing about cars – how to open the hood!:
So to combine these videos into all of the steps I did with my 2016 Honda CR-V EX:
- Pull the hood lever that’s near where the driver’s left leg would go
- Above the left side of the Honda emblem on the hood, push a clasp to the right and lift up the hood at the same time
- Lift the prop rod and put it into the slot on the top of the hood to keep the hood open
- Open the 3 clips on the air filter housing
- Lift the housing lid and remove the old filter
- Clean debris out of the air filter housing if there is any
- Put your new air filter in place and make sure it fits properly around the upper edge (Note: I had to wiggle the air filter around to get it seated properly)
- Close the air filter housing lid and re-engage the clips (Note: You have to hold back all 3 clips while closing the housing so another pair of hands is helpful)
- Hold up the hood and remove the prop rod and snap it back into place against the engine
- Lower the hood halfway and then drop it so that it slams shut
Super easy! Midas wanted to charge me I think $79 for this simple replacement which took maybe 2 minutes. Even subtracting the $13 AirTechnik Air Filter I bought after checking that it fits my Honda’s specs, that’s a savings of $66 or 84%. And that is enough for a nice meal out in the UK 😉 .
Tire Pressure Edition
As I’ve mentioned, I know very little about cars. However, I am obviously trying to learn since I now own one. While my Partner and I were away for 3 months, I lent our car to his family who were very kind and able to use it about every 1-2 weeks to make sure it stays happy.
The night I arrived back, it had been a long travel day and I saw a light on in the car. My tiredness made me think it was the “check engine” light, which is very serious, but later when I had time to sleep and think, I realized it had actually been the “low tire pressure” light, which I know a little about!
I then did some googling and learned that people can fill up the air in their tires for free at a lot of gas stations, including Stewart’s! I love Stewart’s for a lot of reasons, such as focusing on employee profit-sharing, having fresh dairy from local farms (including yummy ice cream), serving fresh food and providing good customer service.
But first my Mom suggested that I check if there’s a nail in my tire to make sure that wasn’t the problem. So my Partner checked for exactly that as I drove super slowly around a parking lot. No nail!
Then I went to Stewart’s and I was excited to see a “Free Air” pump with instructions of how to use it that were super easy. From my research, I knew that I should check my car door or manual for my car’s ideal tire pressure and then test my tires and fill them until I reached that level.
My car door said my tires want to be at 33 psi. So on the Free Air Pump I set it to 33. It then started blowing air so I removed the cap on my tire and attached the air pump. It filled the tire and it beeped when it reached 33 psi.
I then put the cap back on and repeated this for all of my tires. I then reset the tire pressure monitor light in my Honda CR-V by holding a button with the same icon down until it blinked. And then the tire pressure light went off – success! I’m basically Rosie the Riveter 😉 !
Headlight Edition
I got pulled over by a cop one night because my headlight was out. Unfortunately that timing of my bulb going out really sucked because my Partner had a medical appointment he couldn’t miss the next morning when it was supposed to be raining hard, a situation when we would need our headlights. And I didn’t want to get pulled over again.
Once again, community came in clutch – I didn’t know off the top of my head if changing a headlight was something a car noob like me should attempt or if I needed a mechanic, but it turns out that replacing headlight bulbs are super easy! Our family suggested finding the type of bulb on a guide like the one here, buying the replacement at Walmart and then popping it in ourselves.
So we headed to Walmart and in the auto section, headlights are locked up for some reason, but there’s a big book where you can look up the bulb type you need based on your car. Sweet!
I used the call button to get an employee to open the case and…they never came 🙁 . So I went to find someone in person and soon after someone else came to help me.
But I seriously don’t understand why these bulbs are locked up – they’re not very expensive (mine was $15 and I got 2 to replace both at the same time as recommended). So if you know why this inefficient system exists, feel free to let me know in the comments.
Anyway, so we then followed the amazing video below and replaced our headlight bulbs:
We replaced both bulbs because online guides suggested doing that, claiming that usually the second headlight would go out soon after. I assume that’s only the case if the previous owner also replaced both at the same time, but whatever. That’s what we did.
After changing the light, it was a lot brighter, which was awesome. Apparently headlights dim over time until they die – I guess that makes sense, but I never thought about it. So if I notice my headlights are less bright than usual, they might be on their last legs. Anyway, doing another at home car repair made me feel like a badass mechanic and I’m excited to expand my mechanical knowledge.
Misc. Edition
As I mentioned in my last monthly recap, I’ve determined that once again owning something is worse than renting 🙂 . Our car keeps having small issues, which are fixable, but take a little time and thought.
I much prefer letting a rental car company handle these small issues. But I guess this is the life I signed up for. Maybe one day I’ll enjoy this kind of problem solving – one can dream.
One of our rear doors got stuck and wouldn’t open. So I tried to feel around to figure out what was wrong and instead changed something so then it wouldn’t close. Oops!
So I called in reinforcements. My FIL came over with a screwdriver, looked at the working latches and used the screwdriver to get the door latch to match the working latches and it worked! It seemed like we had to press unlock on the doors that weren’t working to make the latch get back into position to then use the screwdriver. Phew!
I also used WD-40 to get rid of some headlight fogginess, which worked well! It also worked well to take off residue from the window from my phone mount. However, my headlights are still a little foggy, so when I feel like it, I’m going to try a new method I saw on YouTube that involves toothpaste. We’ll see what happens 🙂 .
The car was also missing a tiny part on the driver’s door panel when we bought it and I thought “well – this is my life now,” but I had the wild thought that maybe I could get a replacement part and yep they exist! The piece is called an Armrest Door Handle Pull Pocket Cap Cover and I bought a 2 piece replacement for $7. Amazing!
And finally, we noticed on the first warm day, that one of our rear windows didn’t work when we pressed the automatic window opener on the driver door panel or that door’s panel. I’m not sure what’s wrong and am open to any suggestions, but if I can’t figure it out, I’ll text my mechanic…at some point.
Prevent Rust (If It Snows)
As a part of my “how to care for a car that’s often in the snow” routine, I was told to make sure the salt that’s put on the road doesn’t stay on the underside of my car very long because it can rust. So I started looking for solutions.
My first suggestion was to get an oil undercoating on the bottom of my car. Apparently it only needs to be done once a season, costs like $100 and you’re good to go.
However, I searched online and couldn’t find anyone in my area that listed this as something they offer, which was a little weird given how much snow and salt our cars endure each winter…though then again, I also see a fair number of rusted cars around here so maybe it’s just accepted that this happens.
Anyway, then a connection of my mechanic family friend said he would do the undercoating DIY style and we just pay him directly. I was down, but that plan fell through. Fair enough. So I went to the next best thing: Car Washes.
Coming from Georgia I thought car washes were just for vanity – like the rain will get the pollen off your car in a hot second if you wait a few days and that’s free 🙂 . But no, apparently in situations like this, car washes that have undercarriage washes help prevent things like rust.
I did some more research online and it looked like monthly car washes with an undercarriage wash were the most recommended so that’s what I did. I guess I’m bougie now. And the car wash package I got that included the undercarriage wash also had things like a hot wax so my car looked like it had rolled out of a car commercial all winter 🙂 .
Get An E-ZPass
After our last road trip I had issues paying a $1.20 Massachusetts toll, so this month we got E-ZPass, which covers most of the northeast US! We paid $25 and they sent us the pass, which includes the $25 and lets us add money later or have it auto-refill. Lovely!
Confirm Goldilocks Size
When I explained what kind of car we had bought, some of my European readers called our SUV a “bus” which is fair enough in comparison to European cars, which I’ve seen being the size of a single chair. However over here, I’m never the largest car on the road so it doesn’t feel large to me.
Also we intentionally got this size because my Partner is tall and would look kind of hilarious in a smaller car (it would be a clown car situation) and I obviously want him to be able to comfortably drive our car when he gets his license. So this SUV seemed like the best option and it has had unintended perks.
The size of the car has been super helpful for roadtrips for one. We have gone on a few together and a few with my Mom and the car is the perfect size for 3 people to sit comfortably for hours along with all the luggage and groceries we need for a while in the middle of nowhere.
The CR-V’s size has also been helpful for moving things, such as parts of our bed, our giant dining table and a painting that’s taller than me. None of it was a problem. I’ve never regularly driven anything other than a sedan before, but I’m enjoying these surprise perks 🙂 .
Conclusion
And that’s what I learned during my first year of being a car owner! I thought this would be a fairly short list, but I was once again wrong about that 🙂 . I hope some of the things I’ve learned are helpful if you have a car.