
If you’ve been reading my blog for a while, you might have realized that I’ve become obsessed with nail stickers. But before I discovered those, I always loved having beautiful nails, but could never achieve them.
Even if I went to the salon, I would immediately somehow mess up my manicure because I’m a clumsy disaster 🙂 . Enter: Dashing Diva Gloss Nail Stickers – I first tried them about two years ago and I’ve been obsessed ever since.
An easy to apply, affordable way to let me have gorgeous nails year-round? I’m sold 🙂 . And I’ve had a rotating collection of Dashing Diva Gloss nail stickers on my nails for the last two years.
However, I have now discovered that my assumptions about press on nails in general and Dashing Diva’s Magic Press Nails specifically were completely wrong and I’m here to talk about it.
First let’s talk about my incorrect assumptions about press on nails in general. When I saw press on nails previously, I thought they looked a bit strange and fake.
That was when I compared them to my Dashing Diva Gloss nail stickers, which people are often shocked to hear are stickers after they compliment my nails. However, I saw my favorite “NailTuber” talking about Dashing Diva having the best press on nails and when I saw her wearing them, I literally couldn’t tell they were press ons so I decided to try them. And – I’m blown away.
I originally thought that Dashing Diva’s Glaze gel nails that require a UV light would be my most short travel-friendly option for fake nails, but I was sorely disappointed by them. I described that experience below:
So I was a bit wary trying another Dashing Diva product, but I was very surprised by my findings. So lets get into it!
The Experience
I originally tried Dashing Diva’s Magic Press “Strawberries & Sugar” nails. I’ve linked them here from Dashing Diva’s website, but they often only sell products until they sell out so don’t be alarmed if the link goes no where. Here are my pictures wearing these nails:
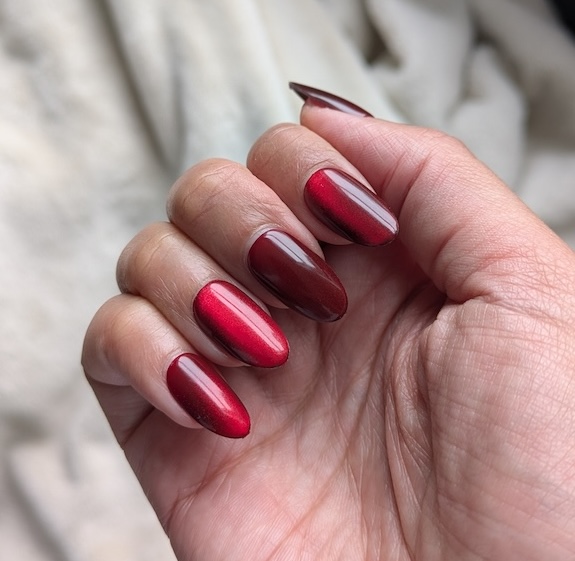
These Magic Press nails have various lengths and shapes so the nails I chose are “Medium” length (they have Short, Medium and Long) and they are “Almond” shaped (they also have Square, Round and Coffin). After wearing these for over a week I bought 7 additional types of Magic Press nails that are all short or medium length in the shapes of almond, square or round 😉 .
Application
These are the steps listed for how to apply Magic Press nails on the Dashing Diva website:
- Prep Nails: Wash hands with soap and water. Use enclosed Prep Pad to ensure nails are clear from oils and residue. Make sure your nails are completely dry before application.
- Select Size: Using the number key located on the clear tab, select a nail size for each finger. For optimal fit, the false nail should not exceed past the nail bed onto skin or cuticles. Peel off clear backing film to expose adhesive.
- Apply: Align false nail with cuticle, making sure to place the clear tab side at cuticle. Press down firmly from centre and side to side.
I did all these steps and pressed on each nail for 30 seconds (I timed it on my phone) like someone on the Dashing Diva subreddit suggested. And after that, I checked if I had any tabs on the end of the nails that the below NailTuber had mentioned in her video I watched.
A few of my nails did have small tabs at the end of the nails from their manufacturing process so I did as she suggested and took the included mini nail file and filed the end of those nails in one direction (not back and forth) in one quick move and the tab disappeared. My nails were perfect and ready to go!
The application process was shockingly easy. I didn’t think I could beat how quickly I can apply Gloss nail stickers, but this took literally 1-2 minutes while Gloss takes at least 15 minutes. I think I could do all 10 Magic Press nails in less than 60 seconds now that I’ve had practice (something fun to test next time 😉 ) .
I didn’t think there could be an easier or faster nail application process than Gloss, but I was proven wrong. I also loved that I need even less tools for Magic Press than with my Gloss nails – I don’t need a top coat to help it look good. I just need the nails, pop them on and go.
Wear
I expected it to feel strange to have press on nails, but I was shocked to discover that wasn’t the case. I literally forgot I had them on after the first day. I just went about living my life and when I looked down, I had gorgeous nails that took like a minute to apply and barely cost more than the more time intensive Gloss nail stickers.
I also was bracing for these press on nails to have the same negatives as the UV Glaze nails I had tried previously, specifically that they would barely adhere to my nail and as a result get caught in my hair, be annoying when washing my hair and fly off randomly when I’m doing normal activities.
Surprisingly, none of that was the case with Magic Press nails. I put them on and immediately headed out the door. I had no trouble putting my hair up at any point.
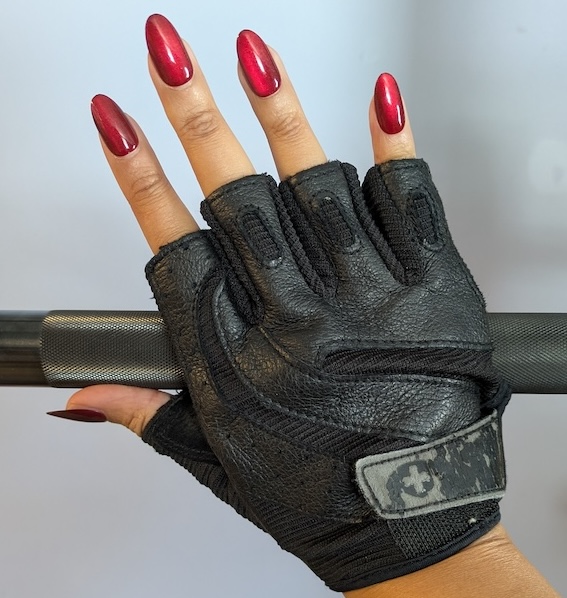
And that first day I had a busy day of errands – buying craft supplies, getting groceries and all the packing and unpacking and carrying that is required with all that. Later I moved large items into our apartment, cooked and even washed dishes without gloves and my nails didn’t budge or get in the way.
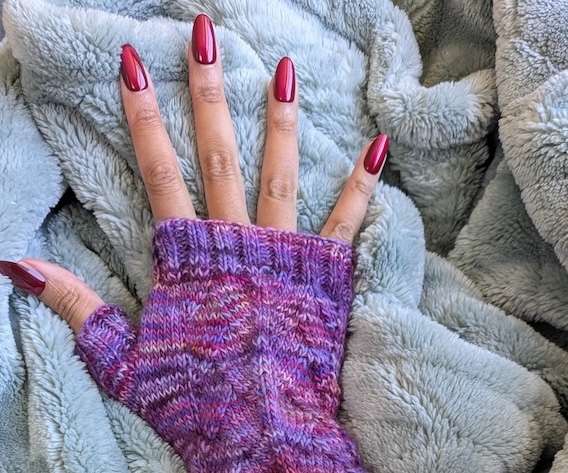
I then knitted an entire forearm length mitten with tiny double pointed needles and was able to do so despite the extra length these nails gave me. But the next day was the ultimate test: washing my hair.
My hair is curly and thick and washing it is a hardcore process that involves detangling it with my fingers after applying a shitton of conditioner. After that, I put oil on my hair and all of these moisturizing concoctions and oils are exactly what dissolves adhesive, but my nails still didn’t budge.
In the end, I washed my hair three times during the 10 days I had these nails on and they never moved. In fact, I still had all the nails well adhered when Day 10 was done and we had reached the “up to 10 days” of wear Magic Press promised. Wild stuff.
A Floss Garrote Aside
I guess I’m a strong flosser who uses my thumb to hold my floss because I noticed that after a few days, I had indented my right thumb press on nail where my floss rests. Curiously, none of my other nails were affected. Weird.
A few days later I was scrabbling through the woods and discovered that the floss indent was actually a cut into the nail – I had held my floss so tightly that I had cut into the Magic Press nail. Oops!
When I got home I then realized that I must have caught that cut nail on something because the nail had broken at the cut mark during my time in the woods. I didn’t notice at the time – I didn’t even feel a pull on my nail or anything.
I used a nail clipper and a nail file to easily reshape the nail. I was really impressed that the nail in general is so solid, but they’re very easy to reshape if needed.
So all of that was good to know for me and I wanted to give y’all a heads up: be careful with floss if you’re a strong flosser like me because you might accidentally garrote the end of your nail.
Removing Without Acetone
On Day 10 of wearing these nails, it was time to remove them since the box claims “up to 10 days” of wear. Dashing Diva says to use their Magic Off+ Remover to take off these press ons, but that’s the same remover they recommend for the Gloss strips that I did not enjoy using when I tried it a few times last year. I found it way worse than the Cuticle Oil that I always use.
So I tried using just that cuticle oil along with a wooden cuticle stick like I do to remove Gloss and it went really well overall. I put oil all around my nails and waited a few minutes. Then I used the cuticle stick to gently scrape under the nail just like with Gloss and the nails came off immediately.
However, they left behind adhesive that took longer to remove. I guess that explains why they were sticking on my nails so well 🙂 . It wasn’t a big deal though. I just added more cuticle oil and used the wooden cuticle stick to gently scrape off the sticky adhesive.
If there was more goop left, I added more oil and continued the gentle scraping. However, there were two nails that had a strangely large amount of goop on them and I was getting impatient to get on with my day. So I decided to take a Prep Pad from my next Gloss manicure and see what would happen.
And unsurprisingly, using that pad (which is basically just nail polish remover), took the remaining adhesive off immediately. So if you’re not wary of nail polish remover (and its dehydrating properties) like I am, I think using it from the beginning would make this a faster process.
I’m curious if wearing these for longer than 10 days would make the removal process even easier since the adhesive would have broken down further. I also didn’t notice until after I took mine off, but the Dashing Diva FAQ suggests dipping the tip of the wooden stick in oil as well to help with a quick removal – I’ll try that next time.
Worth It?
In case I was somehow subtle: I am wildly impressed with these Magic Press nails. After my “up to 10 days” were done, the nails looked the same as when I applied them (minus the floss garrote mishap that was my fault).
And as you can see from the above removal process, I think these nails would have lasted a lot longer than 10 days if I had wanted to test that out. Next time 😉 .
After removing these nails, I put on some Gloss nail stickers (specifically “Irish You Were Here” for St. Paddy’s day) and I was instantly annoyed – uh oh 🙂 . It’s a much longer process to carefully place, pull and file Gloss nail stickers onto my nail compared to the Magic Press process.
Gloss nail stickers are still obviously way easier than going to a nail salon and sitting through the much longer process it would be for a professional to make my nails look the same, but Magic Press spoiled me 🙂 . Those press on nails look a lot better with a lot less effort – and that speaks to my lazy soul 😉 .
- How Being Lazy Helped Me Retire At 30
- How Laziness Saved Me From Bad Financial Decisions
- Why I’m An Unproductivity Advocate
My favorite NailTuber says that Dashing Diva Magic Press are the best press on nails on the market and after my experience, I have to agree that they’re amazing and absolutely worth $10 for 30 nails, which I could use for 1-2 full manicures.
Tips
In case you’re looking to try these Magic Press nails, here are some tips that I used and that I will keep in mind for my future press on adventures:
- To find the right size, place a Magic Press nail on top of your nail with the sticker still on and press it down because it spreads out. It might originally look slightly smaller than your nail before putting it on and pressing it down. Doing this process in advance will help make sure you get the closest fit
- There are numbers at the base of the plastic on the nails so you can make a note of what sizes you use and use the same numbers on your other hand. There are also numbers etched into the very top of the actual Magic Press nail
- Apply the Magic Press thumbs last because you need your thumb to peel the plastic backing off the strips
- To put on the nail, push it gently down to the very base of the nail so it’s flush to the bottom of your nail
- After removing the plastic tab and putting the Magic Press nails on your nail, press down for 30 seconds on each nail to help them adhere properly. Then feel free to keep pressing on them whenever you think of it during the next 3 days to help them adhere even more
- If there are any tabs on the end of the Magic Press nails (they’re from how they manufacture the nails as a group) just take the mini nail file that comes in the kit and file the end in one direction (not back and forth) and the tab will go away
Conclusion
So I have a new love 🙂 . I’m all about the laziest, most affordable way to have beautiful nails and I’ve found a new obsession with Dashing Diva Magic Press. I never thought press on nails would be my thing, but I was wildly impressed and am excited to try all my new press on purchases.
I have a horse and have worried that something like this wouldn’t handle the barn…but it sounds like it may be worth a try?!